Evaluation
Author:
Mikael Häggström [note 1]
.jpg)

- First, look at each microscopy slide by eye, to plan the microscopy screening so as to not miss peripheral fragments.
- Have a systematic direction of screening through microscopy slides, such as from top left to bottom right as seen in the microscope. When two-way mirrored, the starting position of the microscope slide is then with the objective pointing at bottom right.
Artifacts
In microscopy, an artifact is an apparent structural detail that is caused by the processing of the specimen and is thus not a legitimate feature of the specimen. Major artifacts to account for include:
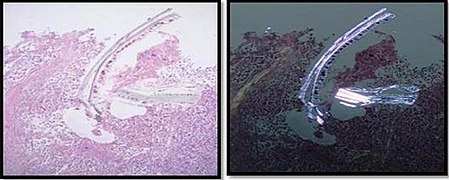
Cellulose contamination, here seen on H&E stain and polarized light, respectively.

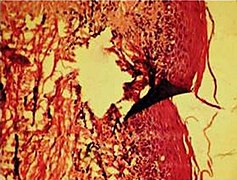
Cardiac muscle (bottom) with contamination from thyroid tissue (center).
Crush artifact from compression by forceps on the tissue sample.

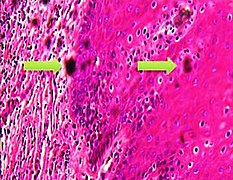
Folding artifacts (white arrows) and a crush artifact (black arrow, with cytoplasmic hypereosinophilia and nuclear pleomorphism) from a needle.

More tearing artifacts, showing that they may be more circular than fusiform.
'Formalin pigment artifacts

Air bubble entrapment artifacts

Staining artifacts by residual wax, resulting in pale areas where cellular structures are not discernible.

A separation artifact in top image makes the tumor look incompletely excised, but the next microtomy level (bottom image) shows a surgical margin of connective tissue.


.jpg)
Notes
- ↑ For a full list of contributors, see article history. Creators of images are attributed at the image description pages, seen by clicking on the images. See Patholines:Authorship for details.
Main page
References
Image sources